Your pearl necklace doesn’t have to sit in a drawer gathering dust. With the right knowledge and a bit of patience, learning how to restring pearls can breathe new life into these treasured pieces. Whether your pearls have become dirty, fuzzy, or stretched over time, restringing is an art form that both professionals and enthusiasts can master—and honestly, it’s incredibly rewarding.
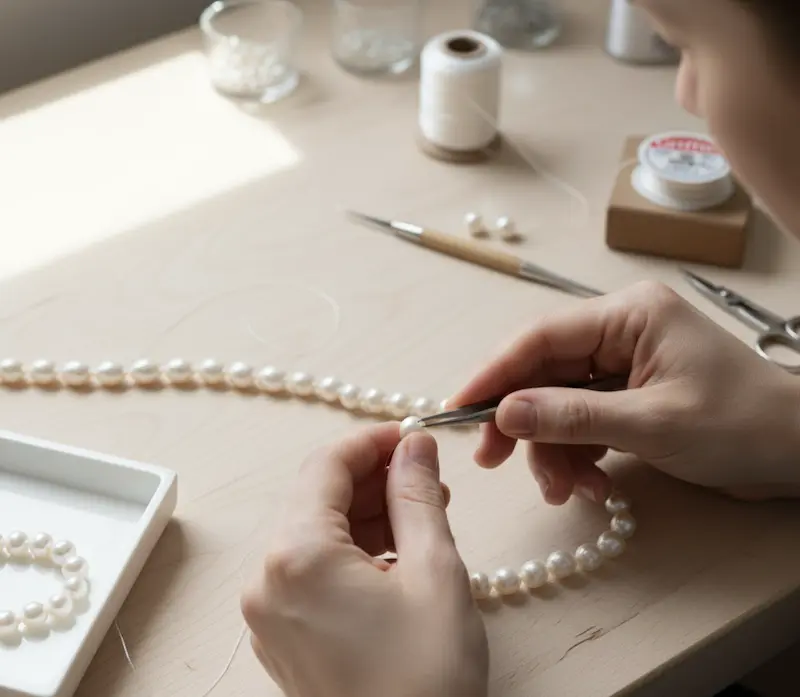
Not only does knowing how to restring pearls save you money on professional services, but it also makes you feel good. It’s about the real joy of fixing something beautiful with your own hands. Plus, every time you wear those pearls after restringing them, you’ll know exactly how much work went into each knot.
Why Restring Your Pearls? Understanding the Real Benefits
Before getting into the technical details of how to restring pearls, it’s important to know why this skill is useful. Pearls aren’t the same as diamonds or gold. Because they are made of organic materials, they need special care and attention.
When you wear a pearl necklace regularly, the thread connecting them gradually weakens. The knots between the pearls—those little details that keep everything together—become fuzzy and worn. This isn’t just an aesthetic issue. When these knots deteriorate, your pearls start rubbing against each other, which damages their lustrous nacre layer.
The pearl industry actually recommends that you restring your pearls annually. Sound like a lot? Not really, considering how long a properly maintained pearl necklace can last. Many pearl enthusiasts keep heirloom pieces for decades by maintaining this simple habit.
Beyond durability, restringing gives you a chance to clean your pearls and restore their natural shine. If your pearls have absorbed sweat, perfume, or environmental dirt (yes, pearls are porous!), you’ll be amazed at how fresh they look once you restring them on new thread.
When Should You Know It’s Time to Restring?
Here are the telltale signs that your pearls need attention:
- Dirty or discolored knots between pearls
- Fuzzy, fraying knots that look worn
- A necklace that’s longer than it used to be (stretched thread)
- Pearls that look dull or have changed color
- Visible damage or loose pearls
Once you spot any of these signs, it’s time to learn how to restring pearls.
Gathering Your Materials: What You Actually Need
Here’s where many beginners get overwhelmed. Let’s break down what you need to successfully complete the process of how to restring pearls without buying unnecessary tools.
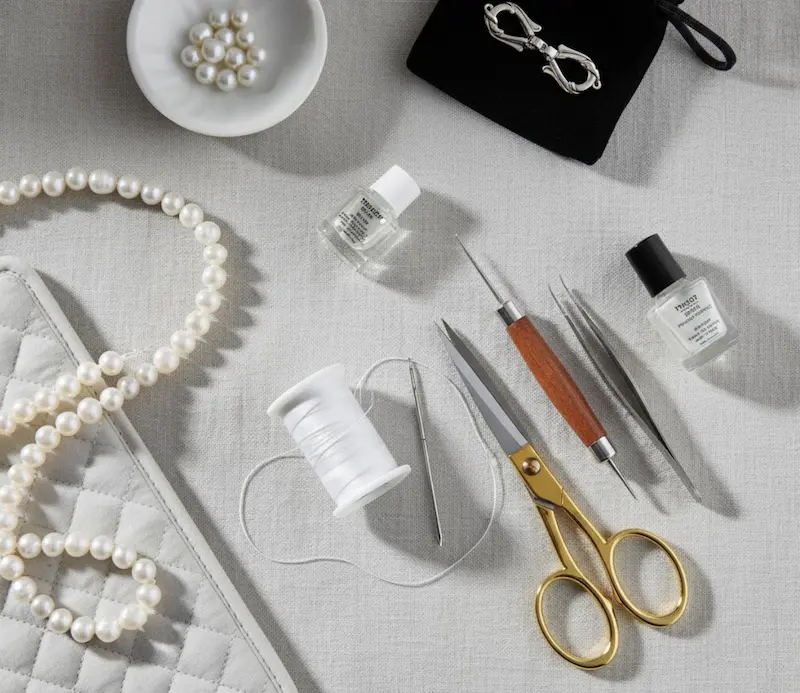
Essential Materials:
- High-quality silk thread (the foundation of your project)
- Beading needle
- Sharp scissors
- Beading awl or tweezers (optional, but helpful)
- Jewelry glue or clear nail polish
- New clasp (if replacing the old one)
- Soft cloth or beading mat
Optional but Recommended:
- Pearl knotting tool (makes the process faster)
- French wire or gimp (adds professional polish)
- Bead reamer (if your pearl holes need enlarging)
The truth is, you don’t need every fancy tool out there. Many experienced pearl stringers work with just tweezers and silk thread. That said, investing in a dedicated knotting tool genuinely saves time and frustration.
When choosing thread for how to restring pearls, silk is your best friend for valuable pieces. Look for thread specifically labeled for pearl work—it needs to be thin enough to fit through pearl holes but strong enough to hold everything together. The thread weight typically ranges from size 2 to 6, depending on your pearl size.
Setting Up Your Workspace: Creating the Right Environment
Before you start learning how to restring pearls, give yourself five minutes to get ready. This step seems easy, but it makes a huge difference in how often you succeed.
Look for a place that is clean and well-lit. A desk lamp works, but natural light is best. You need to be able to see well because you’ll be working with small knots and thin threads. Put your pearls on a soft cloth or mat so they don’t roll away. Trust us, chasing a pearl across the floor gets old fast.
Keep your workspace organized. Have your thread, scissors, needle, and adhesive within arm’s reach. Some people even number their pearls with a pencil mark on the back of the mat to remember the exact order. This is especially helpful for longer strands.
If you use reading glasses, think about wearing them. When you tie tight knots between pearls, the magnification is very helpful.
The Step-by-Step Process: How to Restring Pearls Like a Pro
Step 1: Remove and Inspect the Old Thread
Let’s start the process of how to restring pearls by carefully cutting off the old thread. Use sharp scissors to cut as close to a knot or the end of the thread as you can. This keeps you from accidentally scratching or nicking your pearls.
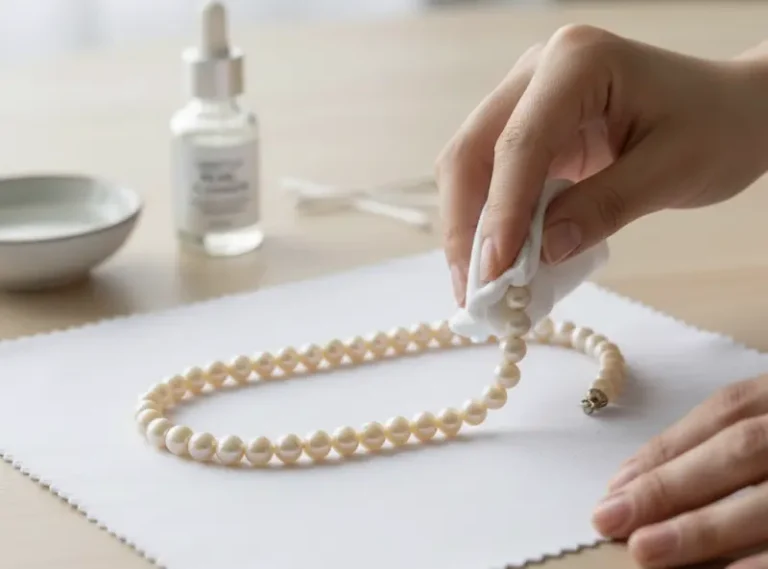
Now, carefully pull out the old thread, making sure to keep your pearls in the right order. As you take each pearl off, give it a quick check for any chips, cracks, or scratches. This is a good time to get rid of any that are damaged before you restring them. As you go, wipe each pearl carefully with a soft, slightly damp cloth to clean it up.
Step 2: Prepare Your New Thread
Cut a length of silk thread approximately two feet longer than your desired finished necklace length. Why the extra length? You’ll need it for knotting and working room.
Thread your needle carefully. Some people like to knot the end first; others wait until they’ve strung several pearls. Find what feels natural to you.
If you’re using a clasp (highly recommended), attach one half to the thread using a secure knot. This is where having a clasp becomes crucial—it keeps your pearls from accidentally sliding off.
Step 3: Begin Stringing Your Pearls
Now comes the meditative part. Start sliding your pearls onto the thread one by one. Work slowly and deliberately. There’s no rush here. Many people find this process genuinely relaxing.
Keep the pearls in the order you removed them from the old strand. Slide each pearl gently down the thread, ensuring nothing catches or snags.
Step 4: Master the Art of Knotting Between Pearls
This is where how to restring pearls becomes an actual skill. Knotting between pearls is what separates a basic string from a professionally restored piece.
Using Tweezers Method (Traditional):
After sliding each pearl onto the thread, make a loose overhand knot. Here’s the key step in how to restring pearls: position your tweezers right beside the pearl. The goal is to have the knot land precisely between each pearl, not randomly somewhere along the thread.
Pull your loop of thread over the tweezers’ tip, tighten gently, then remove the tweezers. This leaves a perfectly placed knot. Repeat with the next pearl.
Using a Knotting Tool (Easier):
Modern knotting tools make this process significantly simpler. You insert the thread into the tool, position your pearl, and let the mechanism create consistent, tight knots. Some people use this method because it genuinely saves hours of work.
Pro Tips for Perfect Knots:
- Each knot should be snug against the pearl but not crushing it
- Consistency matters—try to make all your knots roughly the same size
- If a knot goes wrong, just pull it out gently and try again
- Never rush this part; quality knots are everything
Step 5: Secure Your Necklace with a Clasp
As you approach the end of your strand, you’ll have roughly three pearls left. Thread these onto the silk along with the other half of your clasp.
Make secure knots with these final pearls just like you did with the others. After the last pearl, make a final knot and trim the thread close to the pearl, leaving no loose ends.
Apply a tiny amount of jewelry glue or clear nail polish to your final knots. This prevents any unraveling over time. Let the adhesive dry completely before wearing your newly restrung pearls.
Choosing the Right Thread for Your Pearls
Understanding how to restring pearls also means knowing which thread type matches your pearls’ value and size.
For Valuable Pearl Necklaces: Authentic silk thread is your only choice. High-quality silk ($10-30 per spool) lasts significantly longer than alternatives and provides that luxurious feel that pearls deserve.
For Mixed Pearl and Gemstone Strands: If your strand has both pearls and gemstones, you might want to consider using fishing line, cotton wire, or nylon thread. These tend to be more durable than just silk alone, especially when combined with the extra wear and tear from the gemstones.
For Expandable Bracelets: For those expandable bracelets that stretch, go with silk or nylon thread – they’ll give you that flexibility you need. Just a heads up though, you’ll probably have to restring them more often, since they can easily get snagged and break.
Thread Diameter Matters:
| Pearl Size | Recommended Thread | Why |
|---|---|---|
| Small (4-6mm) | Size 2 silk | Shows pearls, hides knots |
| Medium (7-9mm) | Size 3-4 silk | Balance of beauty and strength |
| Large (10mm+) | Size 5-6 silk | Strength to support weight |
| Mixed/Gemstones | Nylon/Wire | Durability with heavy materials |
When in doubt, ask your local jeweler or a professional Pearl Manufacturer for guidance. They’ll know exactly what works best for your specific pearls.
Common Mistakes to Avoid When Restringing Pearls
You need to know what NOT to do when you learn how to restring pearls. Beginners make these kinds of mistakes all the time.
Mistake #1: Using the Wrong Type of Thread Don’t use cheap nylon or fishing line on valuable pearls to save money. The end result looks cheap, and the thread won’t hold up. Buy the right wholesale pearls grade materials.
Mistake #2: Skipping the Inspection Phase Many people restring pearls without actually cleaning them first. Your beautiful work gets hidden under months of accumulated dirt. Always inspect and gently clean your pearls during the process.
Mistake #3: Making Inconsistent Knots Big knots, tiny knots, medium knots—this inconsistency looks amateur. Spend time perfecting your knot technique before starting your final piece. Practice on inexpensive pearl strands first if needed.
Mistake #4: Rushing the Clasp Attachment A broken clasp or poorly secured attachment defeats the purpose of restringing. Take extra time here. This is the load-bearing part of your jewelry.
Mistake #5: Not Applying Adhesive Skipping the final step of gluing your knots is tempting. Don’t. This tiny bit of insurance keeps your knots secure for years.
Professional Resources and Further Learning
Want to really become a pearl care expert? The British Pearl Association has some awesome in-depth guides on how to care for your pearls and how to restring them. They’re a really respected authority in the pearl world, and their advice is based on solid research. Definitely worth checking out!
A lot of jewelry teachers also suggest watching video tutorials on how to restring pearls at a slower speed. You can learn more by watching experienced hands tie those knots than by reading instructions alone.
Why Restring Pearls Instead of Buying New Ones?
Here’s the honest truth: quality pearls cost money. A single strand of high-grade cultured pearls can cost hundreds or thousands of dollars. Restringing that same strand costs $30-50 in materials and your time. From an economic perspective, it makes sense. From a sentimental perspective? It makes even more sense.
Your grandmother’s pearl necklace has memories and history. That can’t be replaced. By learning how to restring pearls, you’re keeping those memories alive and learning a skill that will be useful for you.
Final Thoughts: Your Pearl Restringing Journey
Restringing pearls isn’t reserved for professional jewelers. It’s a skill that anyone can learn with patience, the right materials, and clear instructions on how to restring pearls. Your first attempt might take two hours. Your tenth attempt might take thirty minutes. This progression is normal and actually part of the satisfaction.
The pearls you loved enough to wear regularly deserve this care. And honestly, once you complete your first restringing project successfully, you’ll probably find yourself offering to restring pearls for friends and family too. It’s that rewarding.
Start with your oldest, most worn strand to practice the knotting technique central to how to restring pearls. Then move on to your most treasured pieces. Before long, you’ll be confidently restoring pearls like someone who’s been doing this for years.
FAQs
Can I restring pearls myself?
For valuable pearls, professional restringing is highly recommended to prevent damage and ensure they are properly secured.
How much does it cost to restring pearls?
Typically $2 to $10 per inch, depending on the strand’s length and whether knots are tied between each pearl.
Is it worth it to restring pearls?
Yes. It is essential maintenance to prevent the cord from breaking, protecting your pearls from being lost and restoring the necklace’s beauty.
What kind of string is used to string pearls?
The traditional and most common material is silk thread. Modern, more durable options include synthetic nylon.

